

Help center
Anatomy of a Shutter
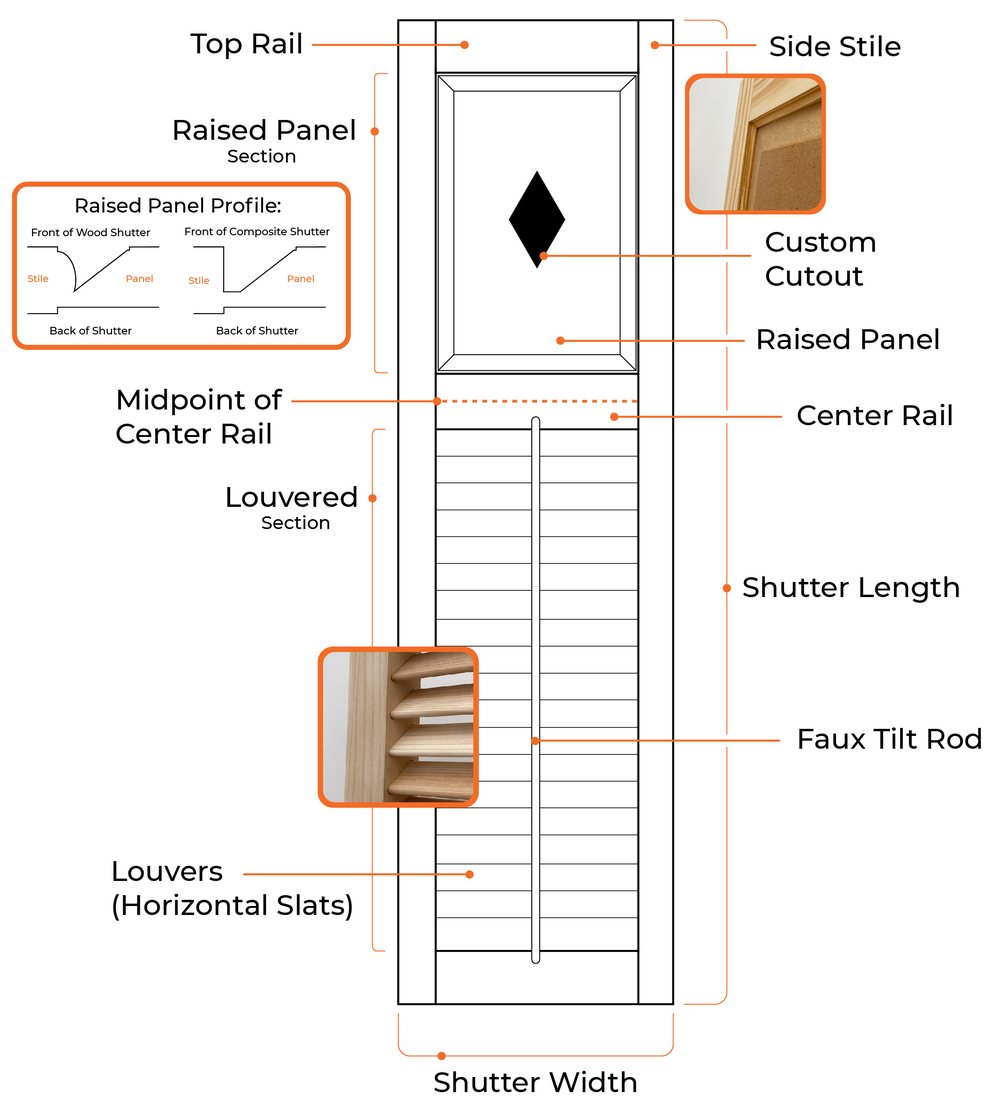
Every part of an exterior shutter, labeled on one drawing, with a short note on what each part does.
The parts, one by one
Stiles
The left and right vertical pieces of the frame. The side stile opposite the hinges can be rabbeted so a closed pair overlaps.
Top, center and bottom rails
The horizontal pieces of the frame. A center rail splits the shutter into sections, such as a raised panel over louvers.
Raised panel
The solid center panel. On wood shutters the edge is a routed bevel; composite shutters use a flat step profile (see the inset on the drawing).
Custom cutout
A shape cut through the panel, such as a diamond, star or anchor. Available on raised panel, flat panel and board and batten shutters.
Louvers
The horizontal slats. Ours are fixed, set at an angle that sheds water.
Faux tilt rod
The decorative vertical rod on the louvers. It looks like the rod that once opened and closed them.
Shutter length and width
Length is the overall height of one shutter; width is one shutter, not the pair. See How to Measure.
Midpoint of the center rail
The dotted line on the drawing. If you want the center rail at a certain height, for example to line up with the window sash, tell us the distance to this point.
More words for shutter parts and styles are in our shutter terms and definitions.